S&T's lunar eclipse preview by Alan M. MacRobert:
http://www.skyandtelescope.com/observing/home/15357796.html
http://www.astrophotoinsight.com/node/697
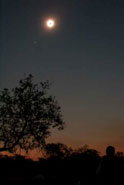
Top 10 Tips for Imaging a Lunar Eclipse
John Drummond, Gisborne, New Zealand
www.possumobservatory.co.nz
10. Know what you will do with the images once you’ve taken them – are they purely for personal use or do you want people around the globe (especially those on the other side of the world who couldn’t see the eclipse) to enjoy them. If you want www.spaceweather.com to use them, be in quick! Or perhaps you want to publish them in the local newspaper, or even in this publication… Also, make sure that you record exposure details (focal length, f-ratio, ISO, exposure length, etc) on printed images for later recall while it’s still fresh in your mind.
9. Know what sort of image you want – do you want a wide angle view with scenery involved or perhaps a Moon-chain across the sky revealing its passage through the Earth’s shadow. Perhaps you want a close-up of only the Moon filling the whole DSLR frame.
8. Once you know your image type experiment with image scale – the shorter the focal length of the lens or telescope the smaller the Moon will appear on the frame. Remember, the Moon is about 30’ (1/2 a degree) in apparent diameter. Ron Wodaski has a very handy program for working out how large the frame FOV will appear with various focal lengths, see: http://www.newastro.com/wodaski/pick_a_camera.htm
7. Have warm clothes, mossy repellent, coffee, etc on hand – this is a rare event, enjoy it. Don’t be battling the cold or mosquitoes as you watch, ‘the celestial dance’ unfolding above (Spock, The Simpsons).
6. Know the eclipse path beforehand – i.e. know what azimuth and altitude the Moon will be at the start, middle, and end of the eclipse. This saves frantically moving imaging gear halfway through the event! Planetarium software programs such as GUIDE (Project Pluto) are very helpful when planning. Also make sure you know the times for your location!
5. Know thy mount – even though the Moon is a bright object and needs only short exposures, it’s helpful to have a motorized tracking mount upon which your lens/telescope can sit and follow the Moon – especially as it gets darker and the exposures will have to be longer. This is very necessary if you are using a longer focal length (e.g. 1500mm) with the resultant large image scale (and large Moon on the frame).
4. Focus, focus, focus - experiment with focusing well before the event. Make a Hartmann Mask if need be, see: http://possumobservatory.co.nz/hartman_mask.htm . There are numerous focusing aids available such as DSLR Focus (Editor's note - DSLR Focus has limited camera support)
3. Experiment with exposure times, focal ratio and ISO – a few nights before the eclipse experiment with your chosen lens/telescope and exposures times. The in-built light-meter works well for this, but have a play and then compare various bracketed images on the computer screen. ISO 400 is a good compromise. For a great resource on recommended exposure times, etc see: http://www.mreclipse.com/LEphoto/LEphoto.html
2. Charge everything! – make sure that all batteries, flashlights, tape recorders, etc are fully charged on the day of the eclipse…and that you have all necessary equipment.
1. Enjoy yourself – sometimes, when such a special celestial event occurs, we run around trying to take as many images with as many cameras and telescopes as possible. At the end you can feel quite exhausted. Something I always have on hand is a deckchair so as to sit down every ten minutes, relax, and enjoy the beautiful changing vista above.
For imaging examples of a lunar eclipse that we enjoyed in New Zealand last August, go to: http://possumobservatory.co.nz/rasnzaps/rasnzaps-comp-2007-08-aug-specia...
Monday, February 18, 2008
Saturday, February 9, 2008
review of Starry Night Pro 6.2 software planetarium program
Starry Night Pro 6.2
http://www.starrynightstore.com/stniso.html
USD $150
c 2007
Macintosh/Windows/
284 Richmond St. E.
Suite 300
Toronto, UN M5A 1PA, Canada
Reviewed Dr. Eric Flescher, (drerickansas@aol.com)
Strengths: Very versatile. Starry Night Pro is a feast for your eyes and astronomical mind. Starry Night works with Macintosh and PC Windows version (different version OS are available). Different pricing for different versions of Starry Night to meet your needs. Upgrades are possible to add to lower priced versions and previous versions can be updated to newer vesions. Starry Night can update celestial coordinates for objects which are “on the go” like comets and satellites. Customizable interface allows for a variety of types of sky and celestial viewing. Other DVDs (DVD Skytheater DVD etc) include simulations, videos and slide shows. Three different ways to locate celestial objects on the sky maps. The sky observing window can be customized with legends, coloration, titles and much more, to showcase your views of the sky. A variety of keyboard shortcuts (Mac and Windows versions) allow quick access of features used frequently. Left hand pane has 12 different options.
Weaknesses: Labeling can be a pain as there are different ways to configure the icons and it is a little confusing. Starry Night Pro 6 requires OSX 10.2.8 or later. (If you use an earlier OS try a different version of SN. The Pro version might have more tools then you might need. See website for differences versions of Starry Night, to see which one might be best for you and price range. Companion Astronomical Guide Books are found for lesser versions then Pro or Pro Plus. Factual information is easily accessed on the User Guide in the Toolbar under HELP.
Rating: 5/5
Introductions
Astronomy is a fascinating to children and adults. To elevate their understanding and observing the planets, celestial objects and phenomenon, many users think about a telescope as their first astronomical instrument of choice. Today planetarium programs, for locating celestial objects and assisting with their assorted endeavors, is a growing first choice before buying a telescope. One software program packed with numerous possibilities for various budgets and astronomical lifestyles is Starry Night.
Currently the Comet Observer Award coordinator for the Astronomical League, I began hunting comets in ernest in 2001 using a version of this program There were many fine astronomical planetarium programs on the market. Starry Night is very Macintosh friendly but is cross platform, so that I could “talk” to amateurs who using the Windows version. Initially having purchased Starry Night before 2001, I needed for the software to be able to update coordinates of objects “that did not sit still” like comets, asteroids and satellites. These objects “that moved in the sky” had to be updated manually to appear in the right place and it was quite a chore. Typing in the new objects into the database was tedious and time consuming. A new version solved my problem. It was a pleasure to have the information updated automatically. Finding and knowing the new accurate coordinates of the objects on a daily basis became a painless process. This was “worth it’s weight in gold” and made my astronomical work more efficient. I could then concentrate on other tasks.
Since then, I have been able to Tlocate and photograph over 36 comets, 10 asteroids,many galaxies, nebulae and more.I become so enraptured with this program and the finding comets that eventually I created the Comet Observers Award. It is now being achieved by many amateur astronomers in the US and abroad. And I have not looked back with this program not only for these reasons but for its versatility, power, Macintosh oriented abilities and ease of use and much more.Since then, I decided to look at the Starry Night 6 version with when I started using OSX 10.4.11, as the previous version 4.5 was slowing down and sometimes crashing. I wanted to see if version 6 could help. I am glad to say it did.
Starry Night Pro works with Macintosh and Windows versions and both versions come on the DVD. Starry Night Pro 6 for Macintosh is native to OSX so your computer needs to have version OSX 10.2.8 or later. (Earlier OSX and Windows version are still available). The program has ten main features. These are (1) Getting Started and using the basic controls; (2) Changing viewing and directions; (3) Sky Data: Using Object databases; (4) Date and time viewing; (5) Labeling objects and configuring your view; (6) Finding working with and viewing your objects; (7) Learning more about objects; (8) Using options; (9) Advanced options etc.; (10) Printing, miscellaneous features and other options.
Getting Started and using the basic controls
Three ways help to control the program: (a) using the tool bar at the top; (b) using the side panes (small panel like vertically placed labels); (c) and/or the button bars (only in Windows version). Operating the controls can be performed in either of the three ways or in combination which gives you on the go flexibility. The disadvantage is that you have to learn three ways of learning the different controls if you want to use the three types of controls depending upon your preferences. It is really a personal, visual and creative preference which way the features are managed. But it is not that difficult and there is much help along the way.
The Starry Night Quickstart is a six sided booklet for helping you get started with the program. Basically the working of the program breaks down to these nine parts. Getting started with the software was the first task.
insert snpro6.2toolbar.jpg
Your desktop opens and to a starry background view. Modifying your viewing direction helps orient a proper accurate view. Clicking on either N, E ,S , W( in the top toolbar) and your “sky” will quickly “slew” (quickly move) to the area which can be viewed on your desktop. A trick I learned , pressing the spacebar, while this was happening, made the action go much more quickly.
The software is highly customizable which adds to the appeal for using the software. Depending upon preferences, the “look and feel” of the desktop could be modified for ”seeing, identifying and observing” in more enjoyable ways. By using the nine Preferences (Starry Night Pro menu with Macintosh and File menu for Windows), general options from the drop down box, users work with additional options. The default cursor is a “hand” icon (is troublesome sometimes) can be changed.
(2) Changing viewing and directions;
The top toolbar can display and change time mode, location and field of view. Options include hiding the toolbar in the View toolbar. The time area shows the date and time for selecting your viewing. The time mode, a series of icons similar like those for movie controls, allows the user to stop or to put into action, the movement of the “heavens” over time during the day or night. Clicking on any of these reveal pulldown menus and ways for even more options. Hiding the toolbar in the View toolbar is an option if you desire. The time area shows the date and time to select your viewing. In the top tool bar is the “ time mode”, which is a series of icons, similar like those for movie controls, allowing the user to stop or to put into action, the movement of the “heavens” over time during the day or night. For example you can let the time progress, stop the “sky” at a different time or switch to a different time frame.
Viewing direction (orientation) by default, shows your view facing south, looking slightly over the horizon. By using the Preferences (Starry Night Pro menu with Macintosh and File menu for Windows) and then the General setting from the drop down box, the user can decide other options. The default cursor is a “hand” icon. Holding the mouse button down and dragging on the window drags the sky view in whichever direction desired. Looking high above the horizon, a red marker called the “zenith” can be seen or if looking straight down, the “nadir” (the point below your feet) can also be observed. These can be changed in the Preferences as well.’’
(3) Sky Data: Using Object databases;
Sky Data is the heart of using these programs. The Object database helps locate deep space objects like double stars, nebula, supernova and other objects. The Solar System Stars and Deep sky objects allows the identification and finding literally millions of objects. The number of objects can also be increased or decreased (hidden from view). Identifying and finding objects in the sky and using the information to simulate the sky, objects, events, phenomenon etc is part of the fun for using such a program.
The Sky data part of the software can add to the multimedia possibilities. Some of the sky date that is required for certain type of celestial objects requires connecting to the Internet (called LiveSky events). It is your option to turn this feature on or off. Upcoming Events in LiveSky can show events immediately (eclipses, planetary conjunctions, moon events for example). The Hertzprung-Russell diagram can also show a multitude of options that emphasizes the stars age versus the stars mass. Starry Night can show 19 million celestial objects but a host of images can be also used from a database know as the Digitized Sky Survey (DSS). Online telescope imaging in the LiveSky control can image a part of the sky by using controlled remote telescope over the Internet.
The Sky Data section shows the astronomical events that can occur or the general sky information settings. Some of the date requires connectivity to the Internet (called LiveSky events and information). Movies, Astronomy Events, LiveSky Pane images, can be played on the SNPro DVD (other levels of SNpro these can be purchased separately). Upcoming Events in LiveSky can show events immediately (eclipses for example). The Status info pane shows general information, field of view, limited magnitude, time (universal time etc), location (longitude, latitude of location etc). The Hertzprung-Russell diagram can show a multitude of options in a different way that emphasizes the stars age versus the stars mass. Starry Night can show 19 million celestial objects but a host of images can be also used from a database know as the Digitized Sky Survey (DSS).
(4) Date and time viewing
Planetarium programs like this one have a myriad of information in the form of databases that can be called upon, replaced, updated, reviewed or viewed at any time. What is amazing is that you can work with the data in many ways and at your whim. One reason I like this particular program is its versatility for customization.
The main parts of the interface show the constellation/sky viewing area, the toolbar and the side bar labels. The top toolbar has 9 different options. The main planetarium interface is easy to view and the constellation/sky scene, the toolbar and the side bar labels were easy to use and helpful. However labeling took awhile to configure and use the way I wanted.
(5) Labeling objects and configuring your view;
Flexibility in terms of labeling can help with identifying objects but so much so it can be a pain. SNPro has multiple options but this makes possibilities confusing sometimes. Some of the options are not where they should be or are located in different parts of the toolbar for further flexibility (or is it confusion?). There are different ways for configuring the icons and it is a little confusing. For example, instead of all information about labeling being in one section, this function is actually in different parts of the Toolbar. By clicking on the objects (Toolbar> Labels), data icons such as objects, planets etc, are turned off/on. Clicking “Options> Solar System> Comets” really brought up what I wanted- how to configure the colors of the comets so that these objects could be displayed in the sky. However nothing happened when I clicked on the color which I thought would made it so in the sky. I had to drag the yellow color (swatch) and place into the top color window. Once that was done, the window turned yellow which meant the comets in the sky would appear as yellow icons and it immediately changed. Working with the Toolbar>Options even more is possible but I found it was “overkill” for me and started to get confusing. Once again Starry Night shows it flexibility, some time more so then you want. Better more flexibility then then too little I thought. It was best for me to find and use an option path and stick with that to avoid confusing. Sometimes SNPro multitasking is not a good thing.
insert snpro6.2mainleftsidepane.jpg
(6) Finding working with and viewing your objects
The left pane listing of celestial objects has titles ( planets, comets etc). The Name, Kind, Semi-Major and Database columns can be widened by dragging the little vertical line to the right of each column in the header row. Furthermore, you can resize the entire side panel by dragging the blue line that runs vertically down the right hand side of the panel. But when you have your object in view, you can identify more about the object. Typing a name like M42 (the Orion Nebula), identified the nebula, set the sky into motion and zoomed in on this pretty nebula. A interesting graphic of the nebula also showed more information. By clicking upon the magnifier icon, brought up a listing of different objects like quasars, constellations etc that could be used to narrow the search of the objects you are looking for.
insert namesalphabetized.jpg
Pressing the FIND button brings up the objects listing that can be used to find celestial objects on your planetarium screen.
insert objectinfo.jpg
Clicking on the “i” in the right hand part of the FIND dropdown menu calls up additional information. However the information is not very specific for each object . For the most part the “facts” are a generic introduction. If you need more specific information then google,a search engines or websites are the better places for finding more specific and detailed information (for example comets ) showed more.
Clicking the little triangle (next to the object category title) allows more of that family of objects to appear. For example, names of many more comets will appear under the main Comets heading when clicking on the little “side-triangle”. Hundreds of Comet names cascade downward (working with the Preferences is a way to customize how many you want). But what if I wanted to alphabetize this listing of comets? Clicking on the Name bar under Solar System did not do the trick at first. clicking on the the title “Comets” (after the rest of them descended), then clicking on NAME helped alphabetize the listing. This made working with the interface easier for me to locate the comet(s) I wanted to find and view.
insert Holmesposition011808.jpg
First I clicked the latest bright comet called Holmes. Clicking on the comet (left side square) then clicking on the name, started the “slewing (moving from one position to the next)”. I found that by holding down the space bar while this happened , made the “slewing” to the object go much faster. The position of Comet Holmes popped into the center of the desktop (my preference but this is customizable), surrounded by all the other stars and objects in that quadrant. Objects that are “checked off” appeared on the desktop as red (my preference but this can also be changed).
(7) Learning more about objects
Sometimes more information is good. There is an amazing array of celestial objects in the sky at any time and date. By clicking on this centered object (or any object nearby), the HUD (Heads Up Display) appeared. This HUD display is customizable by changing the types of information (in toolbar) that will appear (magnitude, altitude etc). I tailor- made my information with the pop-up window so that by clicking on a comet, for example (or another object), a pop-up window displayed the coordinates, magnitude and much more information, using the colored text of my choice. Clicking on other objects helped locate any objects nearby to identify what was nearby in my photographs that I made.
(8) Using options;
Using menu (Macintosh) or the preference (Windows) helped the finding of more options. Normally the sky will appear dark with light stars but white side mode can adjust this in inverse (which is preferable for types of printing). Night vision mode, dims the screen and adds a red tone which is good for viewing a nearby telescope or monitor. The brightness can also be adjusted and the night vision can also be turned off when needed. Full screen mode shows all the celestial objects and hides the screen controls
Multimedia computerized simulations are possible. One of my major obsessions is computer simulations. After all they were a main part of my doctoral dissertation. What is really cool is that with this “time machine” software, you can literally go view objects in the present as well in the past as well as the future. Certain circumstances and events can simulate sky viewing not normally possible. Options include changing locations, elevations, orbits as well viewing locations from a difference vantage point (on the Moon, another planet etc) is possible. For example, on the desktop, I watched as an eclipse of the sun from the moon progressed, as the dark (umbra) shadow was crossing over Libya in 2006. At the same time, I simulated what the sky would look like in 2001 and used it in my eclipse video by captured the simulation on screen and saving to hard drive.
I also went back in time to check out some research for the phenomenon known as the Star of Bethlehem. I devised a simulation that would allow me to see what the sky looked like while trying to view the “Star of Bethlehem” conjunctions (close meeting in the sky) with Venus and Jupiter 2 BC in Jerusalem. It was most interesting to see these objects so close 2000 years ago as historical data had found.
Different formats can be used on the menu (Macintosh) or with the preference (Windows version). Normally the sky appears on a dark background with light stars but the white mode can adjust this (inverted) , which is preferable for printing. Night vision mode, dims the screen and adds a red light hue on your computer which is good for viewing with a nearby telescope or monitor which makes it easier to view both the instrument, your telescope and starry night without a blinding glare. The brightness of the color can also be adjusted and the night vision can also be turned off when needed. Full screen mode shows all the celestial objects and hides the screen controls.
(9) Advanced options etc.
Special tools can synchronize with Starry Night and telescopes. My old telescope can’t work with SNPro. Starry Night offers the possibility of operating a telescope, if you have the equipment, to control one. If this is something you want to do with your Starry Night, it is best to see if your telescope is supported by Starry Night or want to use your current one. before you purchase a new telescope. Macintosh computers use a telescope plug-in that has drivers that are packaged with the main Starry Night installer. (The PC version uses an open source code called ASCOM. The drivers for this are on the CD but need to be installed after inserting the Starry Night Pro disc and choosing “Install telescope support” from the pop-up menu).
The telescope controls are in the Telescope side pane. There are instructions and information to configure your telescope, connecting to your telescope, disconnecting, setting up the telescope, telescope controls and then using a very nice feature called the Observation Planner.
This allows adding special features to your favorites and operating your telescope with Starry Night when you want. This planner allows for the operation of your telescopes and Starry Night for current date or from a different date (use of the Planner side panel pane). Clicking one of the listed objects, these can be added by clicking upon the Add Items window. The full name is displayed or if part of the name is listed, several possibilities will show in the listing and there is the possibility to choose the one desired. Checking in the add window (left hand box) allows the adding of this object to the Observation Planner. Several windows called "filters" (Name, Database, Type, Constellation) can be used if one of these areas are entered. Finding one of these and clicking on the Add button adds to your listing. Clicking on the Name, shows whether than object is visible (if it is not visible, then the object can be deleted from the list immediately as well as any other time). A planned listing is immediately saved and can be recalled by opening the pulldown menu at the top of the Planner and then choosing the required date. The Graph option is very interesting as this offers a visual way of examining object's quality as compared with: time: angular separation; altitude; magnitude; distance; elongation (plotting of the visual separation in the sky between an object in our solar system and its parent body); angular size; and/or time range.
A previous SETI Home plug-in let the software use a popular option that is also available through separate Internet connections. The main goal is to continuously monitor signals that may be signals from extraterrestrial alien life. If selected, this screen saver appears on your screen and launches a continuous stream of data send from a radio telescope from Puerto Rico. Someday you might discover signals from a far away planet. However at this time, SETI does not work with this version but it might do so in the future.
(10) Printing, miscellaneous features and other options
Sky charts can be customized, printed out or even saved or run as later Quicktime movie.
There are also different ways to work with files. Savings the initial settings can restore the setting to correct it. A great feature is the use of multiple settings that can be saved as "sets" after various options are configured. Clicking on the Presets menu (under Options) can turn on any of the presets later.
Working with Starry Night files, image files, movie files, and exporting text files give the user even further flexibility. You can also make movies of your favorite celestial events. For example, I simulated the eclipse of 2001, a viewed traversing the Earth from the Moon. Starry Night allows the capture of movies and then turning these into QuickTime movies. I used such a video simulation which I Integrated into my 2001 solar eclipse movie with other video effects, view and travel information. Exporting images, printing color images. Making movies and then saving them under QuickTime mode is very helpful. Using Starry Night to play back your movies is not needed as these movies can be played on a PC or Mac computers through the use of most versions of QuickTime software players (which is free).
Savings the initial settings is an option. These can be restored if needed or multiple settings can be saved as "sets" by using the Option and then presets option. Clicking on the Presets menu under Options can turn on any of the presets later. Print settings and global preferences can be customized
The astronomical CDs that came with this new version were well done and informative. DVD Skytheater DVD. Those who want to know more about astronomy can use the DVDs that come with it or even purchase other ones. Novice and intermediate users may be useful to give a wider understanding of Astronomy, Advanced users may want to use this version for the extreme flexibility, to control their telescopes and to do advanced sky observing. However for me, I just want to use the sky tools.
Past, present and future are also tools at hand with Starry Night.There is a special events section that shows and presents in simulation format, several lunar and solar eclipses. Also while doing research on the Star of Bethlehem, I “went back in time” and could observe the planetary very close conjunction of Venus and Jupiter in 2 B.C.
Conclusions
Working with OSX 10.4.10, on my Imac, I found Pro version to be a very flexible, faster and did not crash compared to SNPro 4.5. The fact that Starry Night Pro can grow with you, depending upon your needs, desires and astronomical pursuits is one of the strong suits of the Starry Night software. Many years ago, I used Starry Night Pro as a OS 9 version and it accomplished what I wanted to do- find comets and asteroids and show me what was happening in the past, present and future. I will be able to use all the tools in the future when I can get an automated telescope. However the later versions allowed me to update the coordinates upon launch and that has been most helpful.
The DVDs/CDs are “eye candy” and while other users might like using them , these adventures about the solar system, looking at simulated comets and asteroids in space and more are not my main purpose for using this great program. Advanced users may be interested in these other CDs and might want to try the less costly Pro version instead. The other CDs can be purchased later if desired and also work with the other versions of Starry Night, not only the Pro versions. This makes for even more flexibility beyond just being a “planetarium maker” and yields superior product for all astronomical pursuits for all levels of users.
This Starry Night Pro version, like versions before, is fairly easy to use. Once I learned the many control options and discovered which set I preferred to use, my planetarium looked friendlier. moved into position at a good pace and then centered (can be altered in the preferences), on the comets and other objects that I wanted to view. I liked the flexibility for controlling the colors of the various labels so different objects would stand out and be recognized more easily. In particularly I liked the way all the information concerning each object displayed. Once clicked, like on a comet, a listing of all the necessary information (magnitude, declination, right ascension, etc) lined up in a column above the stars. This was an invaluable tool for trying to plan when objects could be observed or photographed.
In the preferences, I increased the number of comets and asteroids that would be updated each time I launched Starry Night. This allowed me to view more of these objects in the Find pane. I made the updater launch when the software was installed. I made sure to have my Internet connection launched before the starry night was launched and for it to operate properly. Once the up-to-date coordinates finished and I closed the window down and started the program up again. This was to insure that the current coordinates would allow the planetarium to place itself into the proper coordinates. If the updater indeed needed to be updated- on some of the days, the updater window would open and the display that “no other corrections were needed.” I made the listing of the Find pane alphabetizes the column area so I could better view the comets and other objects. I also placed check marks next to the comets that I wanted to view when I launched the software at another date.
I configured the “look and feel” of my planetarium interface so that when it launched each time, I could view the sky the way I wanted. I added a mountain scene that had the starry night in the background (there are many other options including feet etc). I reconfigured the colors for the constellation borders, comets, satellites, planets and other objects so that the colors matched what I wanted and so that each object was a different color. I changed the constellation colors to show as light green, the constellation boundaries as darker green, the names of the comets showed in red when targeted( but normally yellow), the stars showed as different shades so on. I also configured the limitations how I could see the brightness of stars and more. Versatility can be fun I found. You can change how you want the sky to appear and much more. And this version was more stable for my OS so what is not to like?
No matter which Starry Night version you choose, the software will allow you to grow with your astronomical endeavors now and the future. There are many fine Astronomical Planetarium programs on the market. However for my astronomical needs then, now and in the future, Starry Night is my choice. The “sky’s the limit” (literally), for your celestial pursuits with Starry Night Pro.
Subscribe to:
Posts (Atom)